How-To Use Photomerge in Photoshop CS5 – CS6
What is Photomerge?
Photomerge is a Photoshop command that combines several photographs / scans into one continuous image — great for scanning large artwork!
How do you get to the Photomerge command?
File –> Automate –> Photomerge
What do you need to be able to Photomerge artwork?
- You should have Photoshop CS5 or Photoshop CS6.
Note: Photomerge was introduced in Photoshop CS3, however; only until CS5 did Photomerge finally stop being buggy. You can use the older versions of Photoshop (CS3 – CS4) to Photomerge, but be forewarned that it does not work as smoothly as it could. - A (good quality) standard-sized scanner. On a personal note, I use an Epson Perfection 4990 PHOTO size A4 scanner, but use whatever scanner works best for you.
- Multiple good scans of your artwork. See the instructions below on scanning artwork using a standard sized scanner.
- Have the Layers palette open in Photoshop.
Why use Photomerge?
- Because (good quality) large format scanners can be pricey.
- It can be a pain to have a shop scan your artwork for you. You are not bound to the shop’s hours of operation, and you have full control of the quality of your art.
- Most publishing houses will happily accept digital scans of artwork from artists for publication in books. No need to send your original illustrations through the mail, thank goodness!
- And… you probably already have Photoshop, so why not use it.
Scanning Tips:
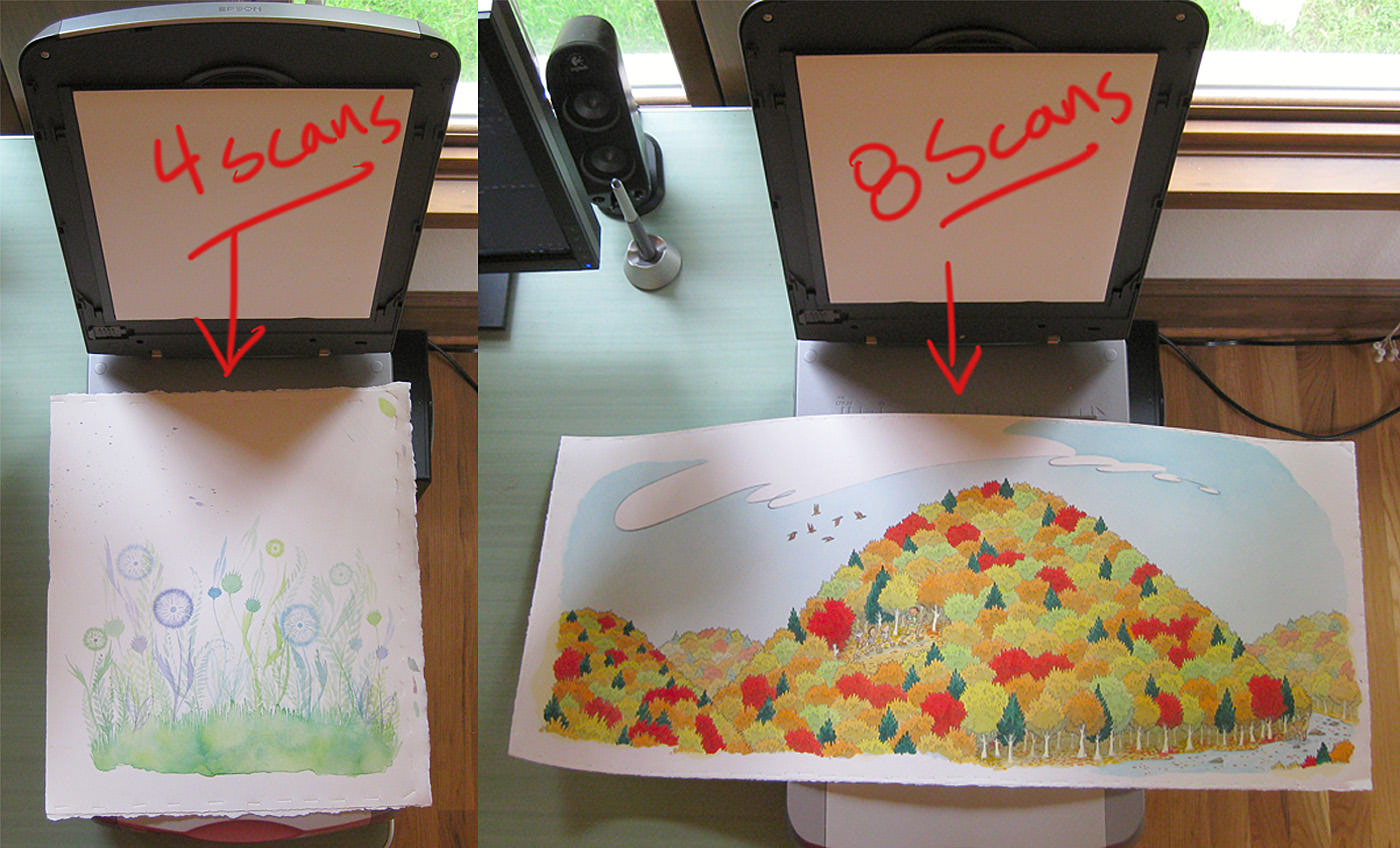
- Overlap your scans by about 2 – 3 inches.
- Rotate and move your artwork between scans to ensure that you have scanned each section of the piece.
- Once the art has been scanned open the scans in Photoshop, and rotate the scans so that they are all oriented consistently.
- This may not apply to you: my scanner has a shadow on the farthest right edge of the scanner bed. So when I am scanning the right edge of my artwork I always place the art one inch from the right edge of the scanner bed to avoid having a shadow on my scans.
- Use masking tape to keep your artwork in place while you are scanning.
- Use a heavy object (like a book) to press the scanner lid down on top of your artwork.
Photomerge:
- Have your Layers palette open.
- Open the Photomerge command: File –> Automate –> Photomerge
- In the Photomerge window there should be an option to choose different types of Layout. For CS5 – CS6 you can use Auto.
- Click on the Browse button and select the scans you would like to have merged together.
- Then press OK.
- Magically, the multiple scans now look like one image, but they are actually multiple layers. Check the image on your screen and if it all looks good merge the layers.
If the image seems a little off you can either:
Move the layers around till the image lines up more correctly.
-or-
Re-scan your artwork using more scans.
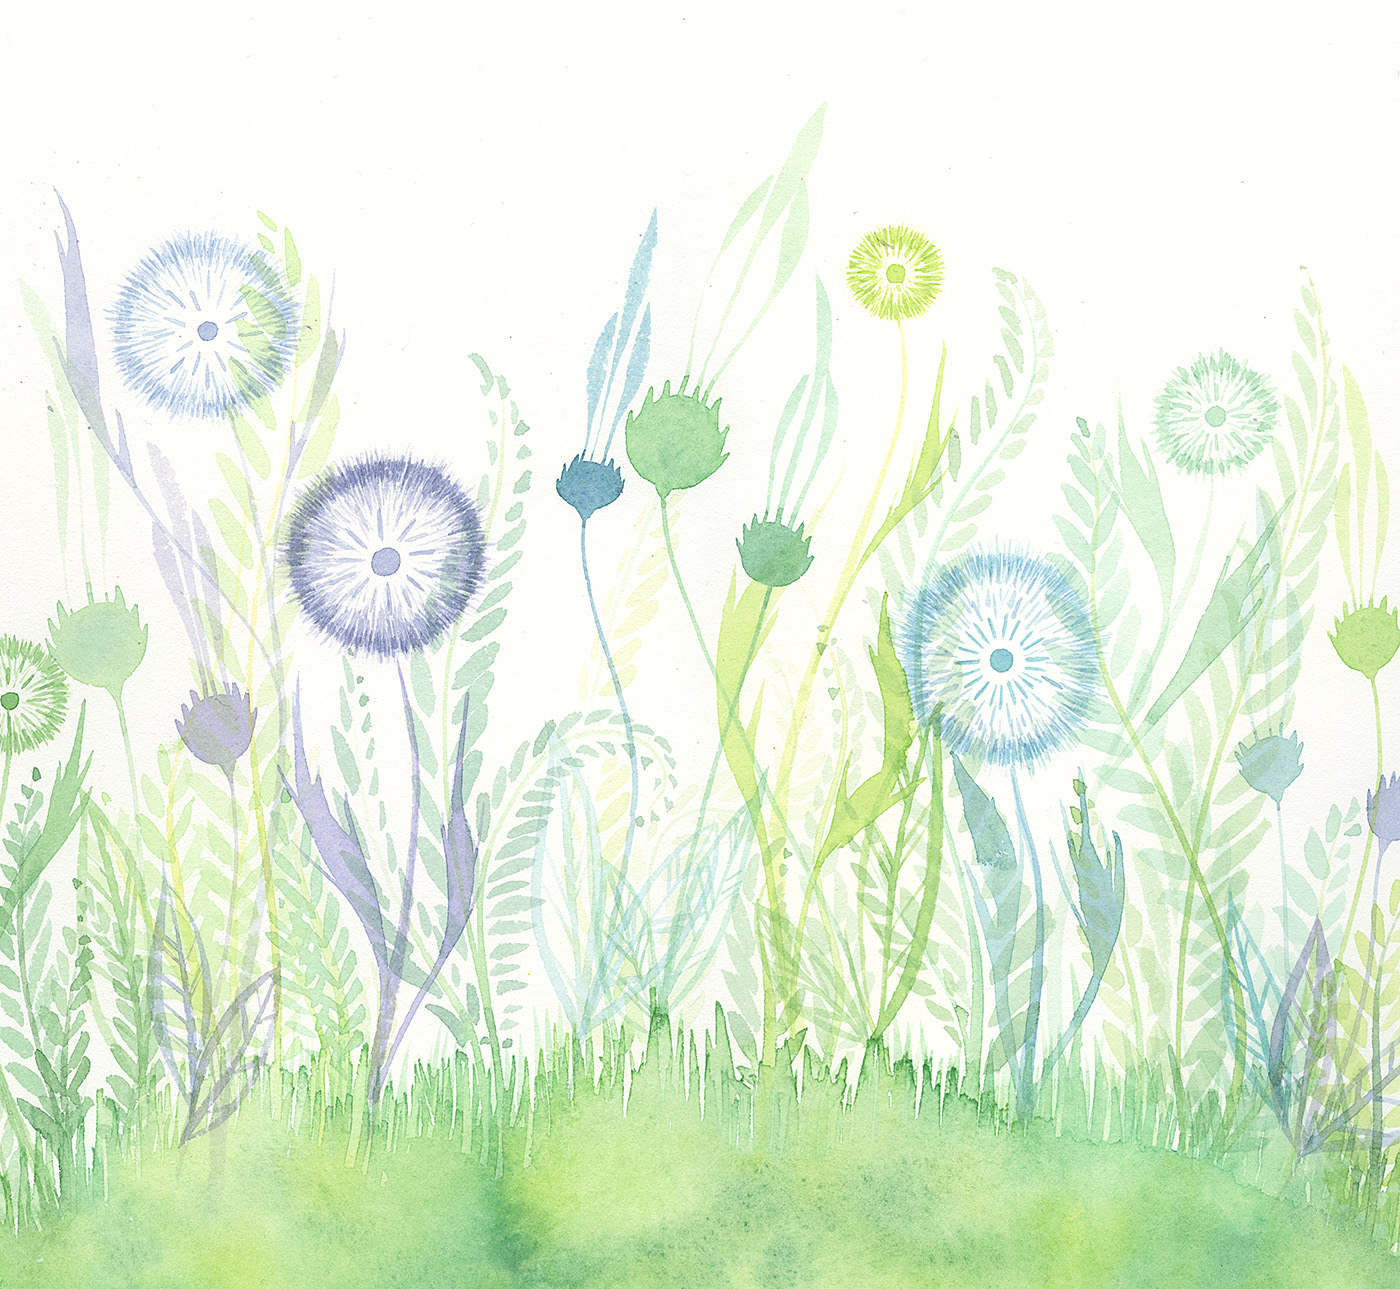
Finished Example (original size 13½” x 15½”):
23 comments:
Hi, thank you for this useful tutorial. I have a question:
the glass on my scanner is recessed slightly from the plastic casing. How do I scan large artwork without creasing it when pressing it into this recess? Do you have a scanner that does not have this recess? All advice welcome, thank you.
Hi Graeme,
My scanner is just like yours and has a recess too. I place a heavy book on the scanner lid to press the art down. I’ve Never had an issue with creasing even with 300 lb watercolor paper. Paper is fairly resilient. Also, if you get enough scans of your art any shadows from the scanner bed should get cropped out in Photomerge. I would not press your art down like this if you are working on a substrate that is inflexible or you are using materials that could be damaged from flexing.
Does that help you out? Please get back with me if you have further questions.
-Marsha
Hi Marsha,
Thanks for this tutorial, you have made my week! I have an Epson Perfection V300 scanner and have been scanning and piecing together my artwork for years in photoshop by using the cloning healing brush tools, so tedious. I can’t believe I didn’t know about Photomerge. I tried it as soon as i read your post and it worked great. What a time savings!
Thanks again for sharing!!
Lana
Hi Marsha,
I have CS4 and this answers my question as I am getting far from satisfactory results. I had access to CS5 for a short time when doing a course and test one and it was fine little did I know my others were going to be so problematic. I have bought pixelmator to supplement my other photoshop requirements do you know any other cheaper programme I could use to do about 20 very very important old 120 film negatives that I have to scan in pieces as I dont have any negative scanner big enough to get the whole image in one piece. I am getting black out for areas that should have darker details and other bits are just not added to the final picture at all. I would have paid the “one month” thing with Adobe but you have to sign up for a year. I have already paid for a local company to scan them and the quality was shockingly poor.
Thanks
Angela
Thanks It’s very usefull
You saved my life! Thanks for this tutorial.
I’m creating several 6- or 7-foot wide photo-backdrops for my HO Rail layout and was wondering how to put the individual photos together without having to do hours of cloning – this “gee, is it really that simple?” explanation was the missing part of the puzzle.
Thanks.
Thank you for such a great and simple lesson. Wow, does this change changes for me. I don’t need a larger scanner and this was so easy.
Thank you! This works perfectly for scanning my watercolors. Appreciate you sharing! “)
Thanks! My first try worked perfectly.
Hey! Love the idea of this, truly. But it’s just not working at all. I’m taking photographs of my work, in 8 pieces, sometimes 10. My work is cubism (blocks of colour, with bold black lines). Seems photoshop is not able to interpret my image because I’ve tried several times, now, and it’s really not working at all. The final is a jumbled mess. All 8 to 10 pieces are sitting in the correct direction. I named them “img_01.jpg”, “img_02.jpg”, etc, in order like reading a book (left to right, top down). And it still comes out jumbled. Can you offer any advice on how I can help photoshop figure it out? Do I need to make an image the size of the final first? That doesn’t make sense, but I’m stumped at this point. Thanks in advance! Using CS6.
Hi Sonia,
I have recently had issues with this as well while scanning in images from books for a presentation.
What I have noticed is that this method is not good for images that have large *textureless* expanses of color with just a single line to link them up, or no line at all.
Unfortunately, I had to digitally composite my scans by hand. You might need to as well.
Sorry about not being a bigger help. I’d love to see your work, do you have an IG account or website?
Thanks, Marsha! I’m actually glad to hear it’s not just -me- discovering that disappointing result. Oh well! And thanks for your interest in my work! My website is https://soniawilkinsonart.com. My IG account is @soniawilkinsonart (same with Facebook). Cheers!
I just found this tutorial and it really helped. The book tip was stellar, as I had a corner always showing up blurry but the Iliad fixed it right up! 🙂 Thanks for sharing this easy to follow set of instructions. My pictures are turning out great!
A few hours ago I just try with youtube and don’t understand anything about how to use-photomerge in photoshop cs5/cs6. But after reading your blog now I understand everything. Thanks for sharing with us.
Hi Marsha,
I just found out about this process, but in your end result, I do not see the difference between your original art (the blue and green flowers) and the finished product, except the the finished product is larger. Is the point of this process just to make an original image result in a larger format by merging the smaller image with the larger?
Hi Patricia,
Good question. The point of Photomerge is to create a digital copy of an original piece of art. If the original image is larger than your scanner bed it can be difficult to hand-piece an image together. Photomerge in Photoshop is a very useful tool to -automatically- piece a large image together so you can have it in a digital format. This is handy if you have an online portfolio, or would like to have prints made of your art. I hope my answer is what you’re looking for.
Great tutorial, I was actually planning on using another method but this worked great! I will say I have a fairly decent setup and photomerging a large format 11×17 scan at 600 dpi put a bit of a strain on my computer; if you’re working with a less-than-powerful machine (no shame) definitely save before you photomerge in case of a program crash…
all in all thanks for the lesson and saving me like an hour! : )
You’re so welcome, Robyn!
And yes, you are right definitely save your work before photo merging if you’re scanning really large files.
Your written article is so effective . I have read this full blog .
Thanks for the thorough explanation.
Wow! Worked great. Exactly what I needed. Thanks.
I’ve been doing this by hand for my wife’s Zentangles for years. That’s saved me hours of fractional degree rotating and nudging!
Thank you.